by Anjuli Ayer, intro by Louise Ayer
Ghee, the golden oil, the most sacred of all the oils, that they have been making in India for five thousand years.
For this month’s magazine I am proud to present a blog post that my daughter Anjuli created in 2008 for her blog called A Smart Mouth. It is a photographic essay that she wrote and for which she took all the photographs. Ghee is a little hard to make unless you see someone do it. She created this essay to let you make your own ghee without someone there to help you. The photos really help you recognize all the different phases that butter goes through as it is cooking into ghee. I have never seen a clearer recipe for the making of ghee. Thank you, Anjuli!
Ghee, or Indian clarified and caramelized butter, is hard to relay in a recipe. There are many visual and aromatic cues to watch out for, and all are subject to interpretation. Learning how to make ghee in my family, like most other things, has always been show, not tell. When my parents were newlyweds, they went to India. My mother spent much of the time observing in the kitchen with my relatives. When I learned, I brought my camera along. Now, four years later, I’m attempting a written version for public consumption. So, we’re breaking new ground here.
I’m documenting the process for you (at length, uh), in the hopes that some will be adventurous and go ahead and try it. I made this ghee three times, a true Goldilocks process, before getting it absolutely perfect. But all three are delicious. Ghee doesn’t disappoint.
It’s wicked easy once you understand how butter cooks. You’re basically clarifying butter, then letting it cook longer until the milk solids caramelize, giving it the unique nutty flavor and sweet aroma only found in ghee.
Clarifying butter, like many other processes in cooking, was borne out of a need to preserve. The process separates the milk solids from the butter fats, resulting in a much longer shelf life. In India, refrigeration is often not an option, and by taking their butter one step further, it has a shelf life at room temperature for up to 2 months. Indians, my relatives among them, claim if it’s made by expert hands it will last 100 years.
According to Ayurveda, ghee is very rejuvenating, and has many health-giving properties. Ghee is the most easily digestible of the cooking fats and oils. Contrary to popular Western belief, ghee is not simply something yummy to spread on toast or cook with potatoes. It is a staple in India, and can be used as a substitute for butter or oil in cooking when the dish is going to be served warm or hot. Ghee, like most oils, can be cooked at higher temperatures than butter without burning, but due to its lower melting point, it’s not the best fat to bake a cake with.
How to make ghee
2 pounds unsalted butter, easier if in 1-pound blocks, if you can find it. (Now that I make ghee on a regular basis, I use 8 pounds of unsalted butter and store it in pint glass jars with screw lids. It makes about 6 ½ pints of ghee. I keep one on the counter that I am presently using and store the rest in the fridge.)
Tools:
Heavy-bottomed saucepan (or large Dutch oven if using 8 pounds)
Unbleached, fine cheesecloth
Metal wide-mouth funnel
Wooden spoon
Glass container with clasping lid that can withstand heat, or pint glass jars with screw tops
Tips:
Purchasing unsalted butter in blocks instead of sticks makes the unwrapping process much easier. Ghee, like butter, tastes differently depending on the source, so don’t go out and buy cheap butter just because you’re making it in bulk. Remember, the ghee will last for a long time. Even if you cook it a little too long or not enough, as long as you don’t burn it, keep it. If it’s overcooked, taste it once it sets. On the flip side, if the milk solids didn’t caramelize, you made clarified butter. So congrats, just store it in the fridge and use it within 1-2 months.
When you stir the butter, you need to glide your spoon across the bottom of the pan, and scrape up any of the milk solids that have settled so they don’t stick and burn. This is important from the point when the butter starts boiling on. Making ghee is a patient, observant, and peaceful process, so let it be just that.
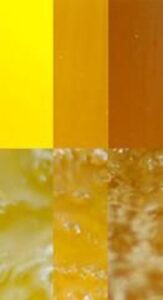
To measure doneness, check the photo above.
The first row in the color chart is the liquid once it’s been strained into the container, and the second row is right before it’s removed from the heat. You can see the color is retained. You’re looking for the butter to go from yellow (on the left), to a slight orange (middle column). If it gets to the darker brown (right column), you’ve gone a little too far.
Note on time:
If you’re using less butter, this process will go faster. It also depends on the diameter of your pan. A smaller pan will cook the butter more slowly, but require more attention. But if the pan is too big and the butter too thinly dispersed, the ghee can easily stick and burn. For two pounds, a 10″ saucepan is just perfect, so you can adjust from there.
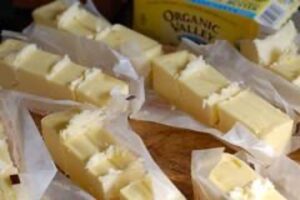
Step 1 – Unwrap the butter and set up shop.
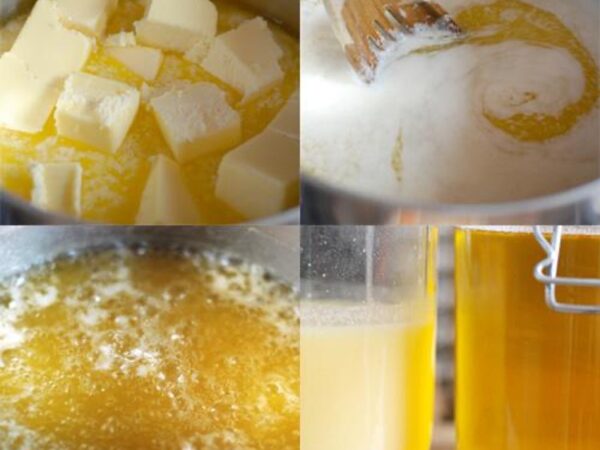
Unwrap the butter and cut into chunks (4 or 5 per stick). Heat the butter on medium-low to low in the sauce pan. Set a timer for 45 minutes.
Fold your cheese cloth so there are four layers, and lay it in the strainer. Don’t wait until the last minute to do this, as there won’t be time! Place the bottle in the sink, and set the strainer propped in its mouth.
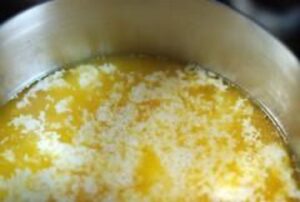
Step 2 – Melt the butter
Within the first 8-10 minutes, the butter will melt. Give it a stir with your spoon to see where it’s at, and then let it sit.
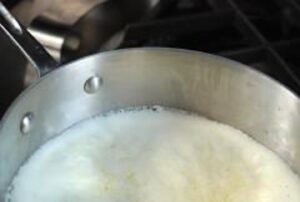
Step 3 – Butter begins to froth and then boil
Within the next 5 minutes, the butter will begin to froth. Give it a stir, and continue stirring every minute from now on. Glide your spoon across the bottom at this point, and kick up the milk solids.
Around 15-18 minutes, the butter will start to boil, and continue for the next 7-10 minutes, first hard, then more gently. Stir consistently. After about 30 minutes, the boil will slow. The butter will start to smell like clarified butter, and you’ll want to dunk a lobster in it.
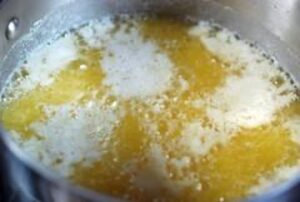
Step 4 – Milk solids separate
At this point (30-35 minutes), the sea of foam will part, and the milk solids will begin to clump together. Watch the edges of the pan. You will notice their change in color as the milk solids cook and finally caramelize. The aroma will be stronger, but still like butter.
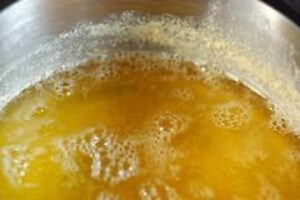
Step 5 – Milk solids begin to caramelize
The last 8-10 minutes, you need to watch the edges of the pan carefully, and observe the change in color. Continue to stir and scrape. The surface should be mostly clear. If you’re unsure of where things are at, scoop up some solids from the bottom and check its color. If it’s still white or light tan, you’ve got 5 more minutes to go. You are waiting for the butter to turn into a beautiful orange color, the milk solids to caramelize into a light-to-medium brown, and most noticeably, fizzy bubbles to form on the surface of the butter. The aroma will change slightly, smelling more sweet and caramel-y.
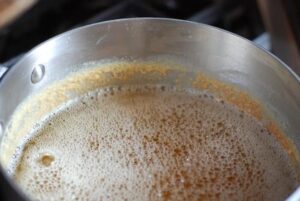
Step 6 – Those fizzy bubbles, strain!
Once bubbles begin to form on the surface, right around 45 minutes, pull up some solids from the bottom and check the edges. They should be medium brown. Take the butter off the heat immediately and strain*, as it will continue to cook until you get it out of the pan. When straining, you can dump all of the brown solids on top of your cheesecloth, but make sure none gets into the ghee. You will have a tiny film on the bottom, but ah, c’est la vie. It’ll still keep for a very long time.
*If you are using 8 pounds of butter and it is time to strain, I take the pan off the heat and use a ladle to pour the ghee into my first bottle watching carefully to make sure I don’t overfill. Then I very carefully move the bottle and put the next bottle in place, transferring the wide mouth funnel, strainer, and cheesecloth to the empty bottle.
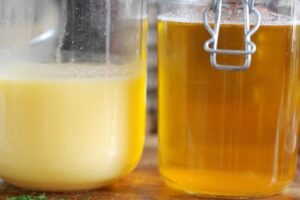
Step 7 – Patience, it needs to set
Keep the lid open until it completely cools (Pictured above. Left, cooled; right, just strained and still hot). Setting can take up to 12 hours.
Once it is set, you should have a smooth, light golden color (properly cooked it’s more gold than yellow from the caramelization) solid that is uniform throughout. It should stay solid at room temp (65-75F). Eat it, love it, become converted like me. Ghee rules.
 Get access to the monthly Rehumanization Magazine featuring contributors from the front lines of this effort—those living on Death Row, residents of the largest women’s prison in the world, renowned ecologists, the food insecure, and veteran correctional officers alike.